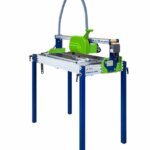
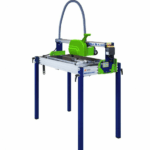
Cutting tile accurately and without chipping is crucial, especially when working with materials as delicate and expensive as marble. Bridge tile saws are powerful tools for this purpose, accommodating larger tiles and offering high precision. This guide is tailored to help you master the use of a bridge tile saw, focusing on techniques like how to cut marble tiles, how to cut tile with a wet saw without chipping, and more.
Contents
Marble tile chipping when cutting
Using a bridge tile saw provides several benefits over other tile cutting methods. Not only do they handle larger tiles, but they also offer enhanced accuracy —key to avoiding chipping. Here’s how to optimize your use of a bridge tile saw for clean, precise cuts.
1. Use a high-quality diamond blade
Whether you’re renting or purchasing your bridge tile saw, the inclusion of a diamond blade varies by supplier. Often, saws come equipped with a general-purpose blade, which might not be optimal for harder materials like porcelain, ceramic, and especially marble. The quality of your cuts largely depends on the diamond blade used. Investing in a high-quality diamond blade designed for hard materials like marble can significantly improve your cutting experience, ensuring smoother, chip-free cuts.
2. Cut in the correct direction
Understanding the correct way to install and operate your bridge tile saw is vital. First, ensure the diamond blade is mounted as per the manufacturer’s instructions. Observing the blade housing (with the saw turned off), you should identify the water outlet meant to cool the blade, indicating the “front” of the blade — the part that should first contact the tile during cutting.
Also, check the core of the diamond blade for any directional markings. Blades typically feature arrows indicating the rotation direction. Ensure the blade rotates downwards into the tile during cutting to minimize chipping risk. Blades rotating upwards can cause the tile to chip and throw debris upwards, posing a safety risk.
3. Start with a bit of masking tape
To further prevent chipping, especially at the beginning of your cut, apply a short piece of masking tape along the edge of the tile, perpendicular to the cut. If chipping persists along the cutting line, consider applying a longer strip of masking tape directly over the line across the tile. This simple trick can help hold the tile together during the cut, reducing chip-outs.
4. Slow down near the end
The speed at which you cut can also affect the outcome. Avoid applying excessive pressure on the bridge tile saw, which can hasten the cutting process but increases the likelihood of chipping. As you approach the final inches of your cut, slow down and proceed with caution. If chipping occurs near the end of the cut, gently push the sides of the tile towards the blade to stabilize and support the tile through the end of the cut.
By following these steps, you can maximize the efficiency of your bridge tile saw and archive clean, precise cuts without damaging your marble tiles. Whether you’re working on a marble mosaic tile, a marble countertop, or simply cutting marble tiles for flooring, these techniques will help you archive professional-quality results without the need for a standard tile cutter.


