Contents
Power floating concrete: A guide for DIYers and professionals
If you want to get a smooth and even floor, you might think that pouring concrete uniformly or using a hand float would be enough. However, these methods can be very tiring and time-consuming, especially if you have a large area to cover, such as a patio or a driveway.
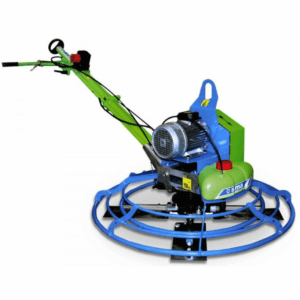
Moreover, they do not guarantee a satisfactory result. That is why experts suggest using a power float, also known as a helicopter or a power trowel, to finish your concrete surface. Power floating concrete can give you a professional and flat surface that looks great and lasts longer. Depending on the size of your project, you can choose between a walk-behind power float or a ride-on power trowel. The former is easier to use and store, and it is ideal for DIY projects at home. The latter is more suitable for bigger industrial projects that require more speed and efficiency.
In this post, we will explain how to use a power float, when to power float concrete, and some tips on power trowel finishing techniques.
Benefits of using a power trowel
One of the main advantages of using a power trowel is that it corrects any flaws in your concrete surface. Nobody likes a bumpy or uneven surface; it can look unprofessional and even pose a safety hazard in some cases. By using a power trowel, you can achieve a flat and smooth surface that enhances the appearance and durability of your floor. Additionally, power troweling increases the density of your concrete, which means that you can save money and materials by avoiding the need for another layer of concrete or a finishing screed. A power trowel can ensure a professional finish without any crooked or cracked pieces, and it can also save you a lot of work and time.
Power trowel finishing techniques
Using a power trowel is not very difficult, but there are some factors that can affect the quality of your finish: The condition of your machine and your technique. You might wonder things like ‘can you power float concrete the next day’ or ‘how to use a power float properly’. These are important questions that we will answer in this section.
When to power float concrete
Timing is a crucial aspect of the process. You should not power float concrete when it is too wet or too dry. You need to find the right balance. If the concrete is too wet, it will peel off and damage the surface. However, if the concrete is too dry, it will not respond well to the power trowel.
Another power trowel finishing aspects to take into consideration are the environmental features such as humidity, temperature and the wind. These characteristics will have an impact on how long it takes before the concrete gets dry. So, pay attention to the instructions and the prescribed wait time, but take into account these aspects, because it may vary.
Among the best power trowel finishing techniques, before using it, we recommend stepping on the concrete when it has started to dry. Your surface is ready to power float when your footprint is ¼” deep or a bit less and it doesn’t bleed much water. If you get much water on the footprint or it is more than ½” deep, wait a little longer and try this technique again. But remember, do not wait too long.
Power float: Float pans and finishing blades
Most power trowels have a float pan and a finishing blade that make the concrete slabs softer. To use it, the first thing you need to do is attach the float pan to the power trowel. Then, after pouring the concrete, when the surface is ready, start the engine and go over the first “row”. Repeat gradually, row by row. You should be walking behind the pulling machine, backwards, in order to even your footprints while you use it. We recommend following a row-by-row pattern to cover the whole area and avoid missing any spots.
Once you have covered the whole surface, repeat the process but perpendicular to the previous one, following the same pattern. Remember that with each pass, the structure will be strengthened as the concrete will be denser and more compact, and the surface will be flat and soft.
Last step: attaching the finishing blade to the power trowel
Once you have finished the perpendicular passes with the float pan, you can attach the finishing blade. Perform again those passes, or even more if you think it might be necessary. Start at a 90º angle to the last pass you did with the float pan. During this first pass, remember to use a flat finishing blade or a very slight pitch.
Then, you can gradually increase the blade pitch through the next passes, so you will add more and more pressure to the concrete, making it more compact. A regular blade has an angle from 5º to 10º. However, if you take more passes, you can increase these angles.


 (8 votes, average: 4.88 out of 5)